Writing a two column proof in geometry might seem a bit challenging at first, but it’s a skill anyone can master with a bit of practice. A two-column proof is simply a way to organize your thinking.
On one side, you list the statements you need to make, and on the other side, you write down the reasons that support each statement. This clear, step-by-step approach helps you build your argument logically, making it easier to understand and follow.
Set Up the Columns
Start by preparing your paper or document with a clear structure. Draw a vertical line down the center to create two distinct columns. Label the left column as “Statements” and the right column as “Reasons.”
The purpose of this setup is to organize your proof in a logical and easy-to-follow manner.
In the Statements column, you’ll list every step you need to prove your geometric concept. Each statement should be clear and precise, representing a logical progression from the previous step. This column is where you build your argument piece by piece.
The Reasons column is equally important. For every statement you make, you need to provide a reason that justifies it. These reasons could be based on given information, geometric theorems, definitions, or properties you’ve learned.
The key here is to ensure that every statement is supported by a solid reason, making your proof airtight.
By setting up your columns this way, you create a clear and structured path that guides you from the initial problem to the final solution.
Write the Statements
After setting up your columns, it’s time to fill in the “Statements” column. This is where you lay out each step needed to prove your theorem or problem. Here’s how to do it:
1. Start with What’s Given
- Identify the Given Information: Begin by writing down any information that’s provided in the problem. This could include specific measurements, congruences, or definitions.
- Use Clear and Precise Language: Make sure each statement is written clearly. Avoid vague terms; be as specific as possible.
2. Break Down the Problem
- Step-by-Step Progression: Move logically from one statement to the next. Each statement should naturally lead to the next, building upon the previous one.
- Use Known Theorems: Incorporate relevant theorems or postulates as you go. This might include properties of angles, triangles, or parallel lines.
3. Include All Necessary Steps
- No Skipping: Ensure that every step necessary for the proof is included. Even if a step seems obvious, it’s important to write it down.
- Maintain a Logical Flow: Make sure the progression of statements is logical. If something doesn’t follow naturally, reconsider the order.
Example of Statements
- Start with the given: △ABC\triangle ABC△ABC is isosceles with AB=ACAB = ACAB=AC.
- State the congruence: ∠B=∠C\angle B = \angle C∠B=∠C by the Isosceles Triangle Theorem.
- Proceed to the next logical step until the proof is complete.
Add the Reasons
Once your statements are laid out, the next step is to fill in the “Reasons” column. This is where you justify each statement you’ve made, ensuring that your proof is logical and accurate.
1. Connect Each Statement to a Reason
- Use Definitions: For basic concepts, rely on definitions. For example, if you state that two angles are supplementary, your reason might be “Definition of supplementary angles.”
- Incorporate Theorems and Postulates: Many statements will require backing up with known theorems or postulates. These could include the Pythagorean Theorem, the Triangle Sum Theorem, or properties of parallel lines.
- Reference Given Information: Sometimes, the reason is simply that the information was provided in the problem. Label these as “Given.”
2. Ensure Logical Consistency
- Step-by-Step Justification: Every statement in your proof needs a corresponding reason. Double-check that each reason logically supports the statement it’s paired with.
- Avoid Gaps: Make sure there are no jumps in logic. Every step should be supported by a reason that follows naturally from the previous one.
3. Use a Variety of Reasons
- Combine Different Sources: You may need to use a mix of definitions, theorems, and postulates to justify different statements. Be sure to use the most appropriate reason for each specific case.
- Check for Common Errors: Sometimes, it’s easy to confuse similar theorems or properties. Double-check that the reason you’ve used is correct for the statement you’re justifying.
Example of Reasons
- “Definition of isosceles triangle” justifies stating that two sides of a triangle are equal.
- “Vertical Angles Theorem” explains why two angles are congruent.
Use Helpful Theorems and Properties
In geometry, theorems and properties are your best friends when it comes to proving statements. Knowing which ones to use and when can make the difference between a solid proof and one that falls apart. Here’s how to incorporate these tools effectively.
1. Learn Key Theorems
- Commonly Used Theorems: Make sure you know the most frequently used theorems, like the Pythagorean Theorem, the Angle Sum Theorem, and the Parallel Postulate. If you’re in 8th grade and want to apply these concepts in practice, try this interactive 8th-grade math quiz and see how well you understand them.
- Understand Their Applications: Each theorem has specific conditions under which it can be applied. For example, the Side-Angle-Side (SAS) Postulate can only be used when two sides and the included angle of one triangle are congruent to two sides and the included angle of another triangle.
2. Apply Properties Wisely
- Properties of Equality: These include the Reflexive Property (anything is equal to itself), the Symmetric Property (if a=ba = ba=b, then b=ab = ab=a), and the Transitive Property (if a=ba = ba=b and b=cb = cb=c, then a=ca = ca=c).
- Properties of Angles and Segments: Use properties like “Vertical angles are congruent” or “Corresponding angles are congruent” when dealing with angles formed by intersecting lines or parallel lines cut by a transversal.
3. Mix and Match Theorems and Properties
- Layer Theorems and Properties: In more complex proofs, you may need to use multiple theorems and properties together. For instance, you might use the definition of a bisector in combination with the Angle Addition Postulate to prove two angles are equal.
- Back Up Each Statement: Every statement you make in the proof should be supported by an appropriate theorem or property. This ensures that your proof is not just a series of assertions, but a logically consistent argument.
Example of Using Theorems and Properties
- Statement: ∠A\angle A∠A and ∠B\angle B∠B are supplementary.
- Reason: Definition of supplementary angles.
- Statement: m∠A+m∠B=180∘m\angle A + m\angle B = 180^\circm∠A+m∠B=180∘.
- Reason: Supplementary angles add up to 180∘180^\circ180∘.
Try an Example
The best way to understand how to write a two column proof is by practicing with an example. Here’s how you can approach it step by step:
1. Start with the Given Information
- Identify What’s Given: Begin by writing down any given information from the problem. For example, if you’re given that △ABC\triangle ABC△ABC is isosceles with AB=ACAB = ACAB=AC, this will be your starting point.
- Set Up Your Columns: On your paper, write this information in the “Statements” column, and in the “Reasons” column, simply write “Given.”
2. Move Through the Proof Step by Step
- Add Each Logical Step: Continue by adding each statement needed to reach your conclusion. For instance, if you need to prove that ∠B=∠C\angle B = \angle C∠B=∠C, you might use the Isosceles Triangle Theorem.
- Justify Each Statement: As you add statements, make sure you provide a reason for each one. If you’re stating that ∠B=∠C\angle B = \angle C∠B=∠C, your reason would be the Isosceles Triangle Theorem.
3. Conclude with the Proof
- Final Statement: The last statement in your proof should be the conclusion you were asked to prove. For example, “Therefore, ∠B=∠C\angle B = \angle C∠B=∠C.”
- Final Reason: The reason here should tie everything together, often referencing a theorem or property that directly supports your conclusion.
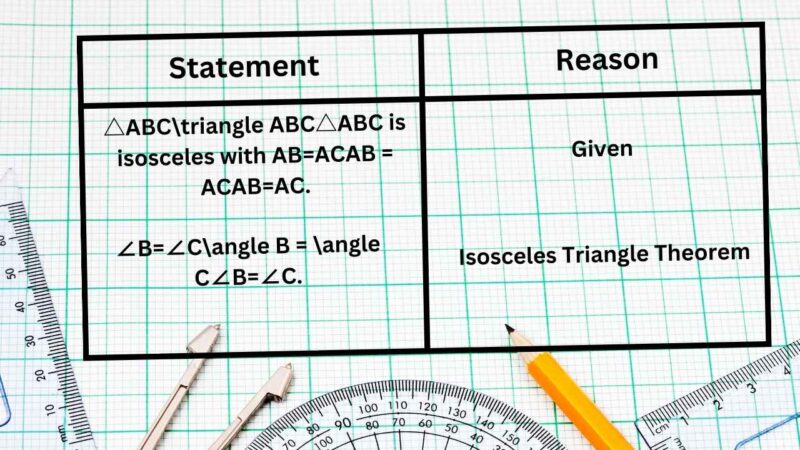
Example of a Completed Two Column Proof
- Statement: △ABC\triangle ABC△ABC is isosceles with AB=ACAB = ACAB=AC.
Reason: Given. - Statement: ∠B=∠C\angle B = \angle C∠B=∠C.
Reason: Isosceles Triangle Theorem.
Practice and Review
The key to mastering two column proofs is practice. The more you work on these types of proofs, the better you’ll get at identifying which theorems, properties, and logical steps to use. Here’s how to practice effectively:
1. Work on a Variety of Problems
- Start with Simple Proofs: Begin with basic proofs that involve straightforward theorems and definitions. These might include proving that two angles are congruent or that a triangle is isosceles.
- Gradually Increase Difficulty: As you become more comfortable, move on to more complex problems that require multiple steps and the use of various theorems and properties.
2. Review Your Work
- Check Each Step: After completing a proof, go back and review each statement and reason. Make sure that every statement is logically supported by a reason and that you haven’t skipped any necessary steps.
- Identify Common Errors: Pay attention to any mistakes you make frequently. Whether it’s forgetting a key step or confusing similar theorems, recognizing these errors will help you avoid them in the future.
3. Seek Feedback
- Ask for Help: If you’re struggling with a particular proof, don’t hesitate to ask a teacher, tutor, or classmate for help. Sometimes, a different perspective can make a difficult problem much clearer.
- Use Online Resources: There are many online resources available that provide examples of two column proofs, as well as practice problems and step-by-step solutions. Utilize these to reinforce your understanding.
Example Practice Problem
- Given: △ABC\triangle ABC△ABC is isosceles with AB=ACAB = ACAB=AC.
- Prove: ∠B=∠C\angle B = \angle C∠B=∠C.
- Statement: AB=ACAB = ACAB=AC
Reason: Given. - Statement: ∠B=∠C\angle B = \angle C∠B=∠C
Reason: Isosceles Triangle Theorem.
FAQs
How many steps should a two column proof have?
The number of steps in a two column proof can vary depending on the complexity of the problem. Most proofs can be completed in 5 to 10 steps, but some more complicated proofs might require more.
The key is to ensure that each step is logical and necessary for proving your statement. If your proof feels too long, review it to see if any steps can be combined or if you’re going down an unnecessary path.
Can I skip steps in a two column proof if they seem obvious?
It’s important not to skip steps in a two-column proof, even if they seem obvious. Every statement you make should be supported by a reason. This ensures that the proof is complete and that someone reading it can follow your logic from start to finish.
Even simple steps, like stating that two angles are congruent because they are corresponding angles, should be included.
What do I do if I get stuck on a two column proof?
If you get stuck on a two column proof, try working backwards from the statement you need to prove. Identify what would need to be true just before your final conclusion, and then continue to work backwards until you reach the given information.
Another strategy is to break the proof down into smaller parts and tackle each one separately. If you’re still struggling, reviewing similar proofs or asking for help from a teacher or tutor can also be beneficial.
Why is it important to practice writing two column proofs?
Practicing writing two column proofs is essential because it helps you develop logical thinking and a deeper understanding of geometric concepts. The more you practice, the better you’ll become at identifying which theorems and properties to use, and you’ll improve your ability to structure your thoughts clearly.
Regular practice also prepares you for exams and helps you gain confidence in your problem-solving skills.
Conclusion
Becoming skilled at writing a two column proof in geometry involves understanding the logical progression of each step. By properly setting up your columns, carefully selecting your statements, and supporting each one with valid reasons, you create a clear and effective proof.